Écrans d’atelier UV Mate Pro
Choisissez votre écran.
Téléchargez uniquement le firmware qui correspond exactement à votre carte Waveshare. L’application UV Mate reste utilisable sans cet écran.
 Recommandé
ESP32-S3 · version 0.9.17
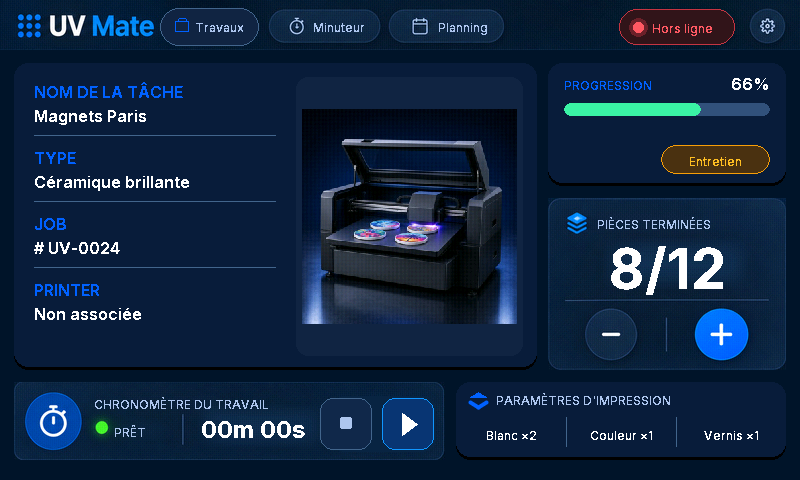
Waveshare ESP32-S3 Touch LCD 7″
Écran 800 × 480, 16 Mo de flash. Gestion complète des tâches et fonctionnement hors ligne.
Télécharger le firmware complet ↓Fichier .bin complet · installation initiale
ESP32-P4 · version 0.6.2
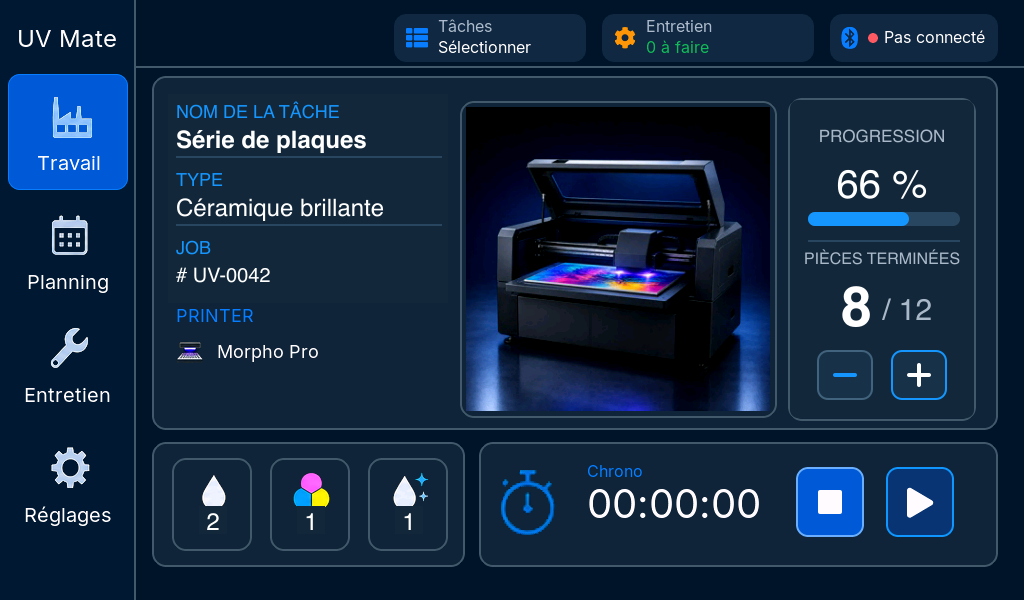
Waveshare ESP32-P4 7B
Écran 1024 × 600 avec coprocesseur ESP32-C6. Tâches, validation hors ligne et alertes de maintenance.
Télécharger le firmware complet ↓Fichier .bin complet · installation initiale
Avant l’installation
Vérifiez le modèle inscrit sur la carte.
1Identifiez la carte
Le firmware S3 et le firmware P4 ne sont pas interchangeables. Ne flashez pas une carte différente.
2Sauvegardez si nécessaire
L’image complète efface le firmware actuellement installé et les données locales de l’écran.
3Connectez UV Mate Pro
Après le redémarrage, ouvrez Réglages › Remotes UV Mate dans l’application pour associer l’écran.
Besoin d’aide pour l’installation ? Contactez l’assistance UV Mate.
UV Mate Pro workshop displays
Choose your display.
Download only the firmware that exactly matches your Waveshare board. The UV Mate app works without an external display.
Recommended ESP32-S3 · version 0.9.17
Waveshare ESP32-S3 Touch LCD 7″
800 × 480 display, 16 MB flash. Complete job management and offline operation.
Download complete firmware ↓Complete .bin file · initial installation
ESP32-P4 · version 0.6.2
Waveshare ESP32-P4 7B
1024 × 600 display with ESP32-C6 coprocessor. Jobs, offline completion and maintenance alerts.
Download complete firmware ↓Complete .bin file · initial installation
Before installation
Check the model printed on the board.
1Identify the board
S3 and P4 firmware are not interchangeable. Do not flash a different board.
2Back up if needed
The complete image erases the currently installed firmware and local display data.
3Connect UV Mate Pro
After restarting, open Settings › UV Mate Remotes in the app to pair the display.
Need installation help? Contact UV Mate support.
UV Mate Pro Werkstatt-Displays
Wählen Sie Ihr Display.
Laden Sie nur die Firmware herunter, die exakt zu Ihrem Waveshare-Board passt. UV Mate funktioniert auch ohne externes Display.
Empfohlen ESP32-S3 · Version 0.9.17
Waveshare ESP32-S3 Touch LCD 7″
800 × 480 Display, 16 MB Flash. Vollständige Auftragsverwaltung und Offline-Betrieb.
Komplette Firmware laden ↓Komplette .bin-Datei · Erstinstallation
ESP32-P4 · Version 0.6.2
Waveshare ESP32-P4 7B
1024 × 600 Display mit ESP32-C6-Coprozessor. Aufträge, Offline-Abschluss und Wartungshinweise.
Komplette Firmware laden ↓Komplette .bin-Datei · Erstinstallation
Vor der Installation
Prüfen Sie das aufgedruckte Board-Modell.
1Board identifizieren
S3- und P4-Firmware sind nicht austauschbar. Flashen Sie kein anderes Board.
2Bei Bedarf sichern
Das vollständige Image löscht die installierte Firmware und die lokalen Display-Daten.
3UV Mate Pro verbinden
Öffnen Sie nach dem Neustart Einstellungen › UV Mate Remotes in der App.
Hilfe bei der Installation? UV Mate Support kontaktieren.
Pantallas de taller UV Mate Pro
Elige tu pantalla.
Descarga únicamente el firmware que corresponde exactamente a tu placa Waveshare. UV Mate funciona sin una pantalla externa.
Recomendado ESP32-S3 · versión 0.9.17
Waveshare ESP32-S3 Touch LCD 7″
Pantalla 800 × 480, flash de 16 MB. Gestión completa de tareas y funcionamiento sin conexión.
Descargar firmware completo ↓Archivo .bin completo · instalación inicial
ESP32-P4 · versión 0.6.2
Waveshare ESP32-P4 7B
Pantalla 1024 × 600 con coprocesador ESP32-C6. Tareas, finalización sin conexión y avisos de mantenimiento.
Descargar firmware completo ↓Archivo .bin completo · instalación inicial
Antes de instalar
Comprueba el modelo impreso en la placa.
1Identifica la placa
Los firmwares S3 y P4 no son intercambiables. No instales el de otra placa.
2Haz una copia si hace falta
La imagen completa borra el firmware instalado y los datos locales de la pantalla.
3Conecta UV Mate Pro
Tras reiniciar, abre Ajustes › Remotes UV Mate en la app para vincular la pantalla.
¿Necesitas ayuda? Contacta con el soporte de UV Mate.